Table of Contents
ToggleThat sinking feeling isn’t just your mood when Monday rolls around, it’s your office chair slowly descending every time you shift your weight. A failing gas cylinder is one of the most common office chair problems, but it’s also one of the easiest to fix yourself. Most people assume they need to buy a whole new chair, but replacing the cylinder typically costs $15–$40 and takes about 30 minutes. No special skills required, just a few basic tools and a willingness to get a little physical with your furniture. This guide walks through the entire process, from diagnosing the problem to installing a new cylinder that’ll keep you at the right height for years to come.
Key Takeaways
- Office chair cylinder replacement is a cost-effective DIY fix costing $15–$40 and taking about 30 minutes, versus buying an entirely new chair.
- A gas cylinder fails when internal seals wear out or are damaged, causing the chair to sink slowly or drop suddenly—both signs you need an office chair cylinder replacement.
- You’ll need only basic tools like a rubber mallet, pipe wrench, work gloves, and safety glasses to successfully remove and install a replacement cylinder.
- Always verify that your new cylinder matches the stroke length (usually 4–7 inches) and weight rating of your old one before ordering.
- Test the new cylinder’s height adjustment lever through its full range and check for wobbling to ensure the tapered connections are properly seated.
- Never disassemble the gas cylinder itself due to internal pressure risk; always replace the entire unit and consider replacing caster wheels if worn during the repair.
What Is an Office Chair Gas Cylinder and Why Does It Fail?
The gas cylinder, also called a pneumatic cylinder or gas lift, is the metal tube connecting the chair base to the seat mechanism. Inside, it contains compressed nitrogen gas (not actually “gas” in the flammable sense) and a piston system that allows height adjustment when you pull the lever.
Cylinders fail for a few predictable reasons. The internal seals wear out over time, especially with heavy daily use, allowing the nitrogen to escape gradually. Once the gas leaks out, the cylinder can’t maintain pressure, and the chair slowly sinks under your weight. Cheaper chairs often use lower-grade seals that deteriorate faster, budget cylinders might last 2–3 years, while quality ones can go 7–10 years.
Physical damage is another culprit. Dropping into the chair heavily, exceeding the weight rating (most standard cylinders are rated for 250 pounds), or exposing the cylinder to extreme temperature swings can compromise the seals. You’ll know the cylinder has failed when the chair won’t stay at your set height, sinks slowly during use, or drops suddenly when you sit down.
Replacement cylinders are standardized. Most office chairs use a universal Class 4 gas cylinder with a 2-inch stroke (the distance it extends), though some larger executive chairs need a longer stroke. The taper fittings are also standardized, so a replacement cylinder from any reputable supplier should fit your chair base and seat mechanism. Just verify the stroke length and weight rating match your needs before ordering.
Tools and Materials You’ll Need for Cylinder Replacement
This project requires minimal tools, most of which are already in a basic toolbox:
Tools:
- Rubber mallet or dead-blow hammer (essential for breaking tapered connections)
- Pipe wrench or large adjustable wrench (10-inch or larger)
- Flathead screwdriver or pry bar (for removing retaining clips)
- Work gloves (metal edges can be sharp)
- Safety glasses (protects eyes when striking metal parts)
- Penetrating oil like WD-40 or PB Blaster (optional, for stuck connections)
- Old towel or cardboard (to protect your floor)
Materials:
- Replacement gas cylinder (verify stroke length and weight rating)
- Replacement caster wheels (optional, if yours are worn)
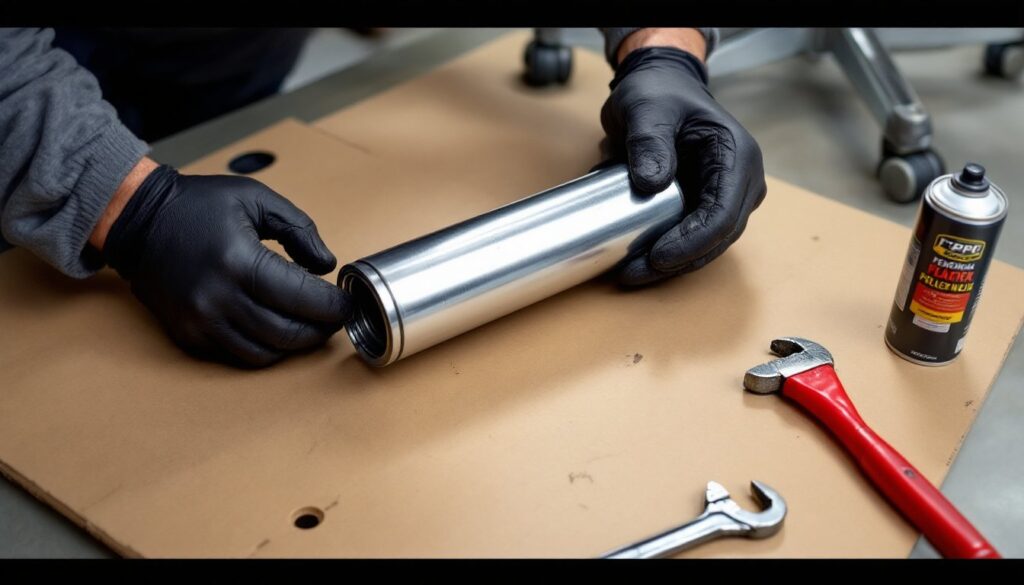
A pipe wrench works better than a standard adjustable wrench for gripping the smooth cylinder shaft without slipping. If you don’t have a rubber mallet, a regular hammer works, but wrap the striking surface with a rag to avoid denting the metal base. Don’t substitute with a wooden mallet, you need solid impact force to separate the tapered joints.
Most cylinders cost between $15–$40 depending on stroke length and weight capacity. Heavy-duty cylinders rated for 300+ pounds run $30–$50. Order from office furniture suppliers or general retailers, just avoid the absolute cheapest options, as DIY furniture repairs demonstrate that quality components last significantly longer than bargain-bin replacements.
Step-by-Step Guide to Removing the Old Gas Cylinder
Put on your work gloves and safety glasses before starting. Flip the chair upside down on an old towel or cardboard to protect both the chair and your floor. Make sure you’re working in a space with enough room to maneuver, a garage or driveway works better than a cramped home office.
Removing the Chair Base
The five-star base (the part with wheels) is held onto the cylinder by friction alone, there are no screws or clips. The cylinder shaft has a slight taper that wedges tightly into the base’s center hole. To remove it:
- Grip the base firmly with one hand to stabilize it.
- Strike the base from underneath, directly where the cylinder enters, using sharp upward blows with your rubber mallet. Hit hard, timid taps won’t work. Aim for 4–5 solid strikes.
- The base should pop free. If it doesn’t budge after 10–12 hits, spray penetrating oil around the joint where the cylinder meets the base. Wait 10 minutes, then resume striking.
- Once loose, pull the base straight down and off the cylinder shaft.
Some bases have a retaining clip (a metal ring) securing the cylinder. If you see one, pry it off with a flathead screwdriver before striking the base. Save the clip if it’s in good condition, you might need it for the new cylinder, though most replacement cylinders include a new clip.
Separating the Cylinder from the Seat Mechanism
The top of the cylinder fits into the seat mechanism (the metal plate under your seat) using the same tapered friction fit. This connection is often tighter because it bears your full weight every day.
- With the chair still upside down, locate where the cylinder shaft enters the seat mechanism’s center hole.
- Grip the cylinder firmly with your pipe wrench about 2–3 inches below the seat mechanism. Tighten the wrench hard, the cylinder will have a smooth chrome finish that can slip.
- Strike the top of the seat mechanism with your rubber mallet, working around the perimeter of the cylinder entry point. You’re trying to shock the taper loose, not dent the mechanism, so use controlled force.
- If the wrench allows you to twist while striking, apply rotational force, this can help break the taper seal.
- For seriously stuck cylinders, spray penetrating oil at the joint and let it sit for 15–20 minutes. Heat from a heat gun (set on low) can also help, but don’t overheat plastic components nearby.
Once the cylinder separates, pull it straight out of the seat mechanism. If there’s a retaining clip at the top, remove it with your screwdriver. Many repair tutorials emphasize patience here, this connection takes the most effort, and rushing leads to stripped threads or bent mechanisms.
How to Install Your New Office Chair Cylinder
Installing the replacement is straightforward since you’re just reversing the removal process. Before starting, verify your new cylinder matches the old one in stroke length. Most standard chairs use a 4-inch to 5-inch stroke, while taller models need 6–7 inches.
-
Insert the cylinder into the seat mechanism. Hold the chair upside down and push the tapered end of the new cylinder straight into the center hole of the seat mechanism. Push firmly, it should seat with light hand pressure. If your cylinder came with a new retaining clip, snap it into the groove on the cylinder shaft before inserting.
-
Attach the base to the cylinder. Align the base’s center hole with the bottom of the cylinder shaft (the narrower, tapered end). Push the base straight up onto the cylinder. You’ll need firm pressure here. Once it’s started, flip the chair right-side up and press down on the seat with your full body weight. This drives the tapered connections tight.
-
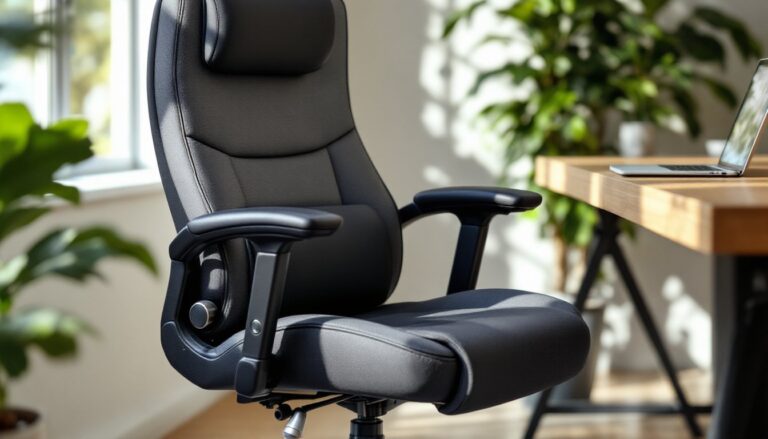
Test the mechanism. Sit in the chair and operate the height adjustment lever several times through its full range. The chair should rise smoothly when you lift your weight off the seat and pull the lever. It should also lock firmly at any height when you release the lever.
-
Check stability. Rock side to side and front to back. There should be no wobble at the base connection. If you feel play, flip the chair over and strike the base upward a few more times to seat it fully on the cylinder taper.
Some replacement cylinders include a plastic cone or cover where the cylinder enters the seat mechanism, this is cosmetic and snaps on after installation. If your old cylinder had one and the new one doesn’t, you can often reuse the old cover if it’s in good shape. Following proper step-by-step guides for furniture repair ensures connections are secure and safe for daily use.
Troubleshooting Common Cylinder Replacement Problems
The new cylinder won’t stay up. If your replacement cylinder sinks immediately, you either received a defective unit or the seat mechanism’s release valve is stuck open. Test the cylinder outside the chair by pulling the adjustment pin, it should extend and hold position. If it works independently, the problem is with the seat mechanism’s trigger, not the cylinder. This usually requires replacing the entire seat mechanism assembly.
The base or seat mechanism won’t release from the old cylinder. Extremely stubborn connections sometimes need more aggressive measures. Try clamping the cylinder in a bench vise (use wood blocks to protect the chrome finish) and striking the base or seat mechanism with more force. Alternatively, some DIYers cut the old cylinder with a reciprocating saw, just cut between the base and seat mechanism, then knock out the remaining stub from each part separately. Wear safety glasses and gloves if cutting metal.
The chair rocks or wobbles after installation. This means the tapered connections aren’t fully seated. Flip the chair upside down and strike the base firmly upward onto the cylinder. For the top connection, sit in the chair and bounce your full weight a few times, this usually completes the seating process.
The cylinder is too short or too tall. If your replacement doesn’t achieve the height range you need, you ordered the wrong stroke length. Measure the collapsed and extended length of your old cylinder before ordering. Standard cylinders have a 4-inch stroke (meaning 4 inches of height adjustment), but executive chairs often use 5–7 inch strokes.
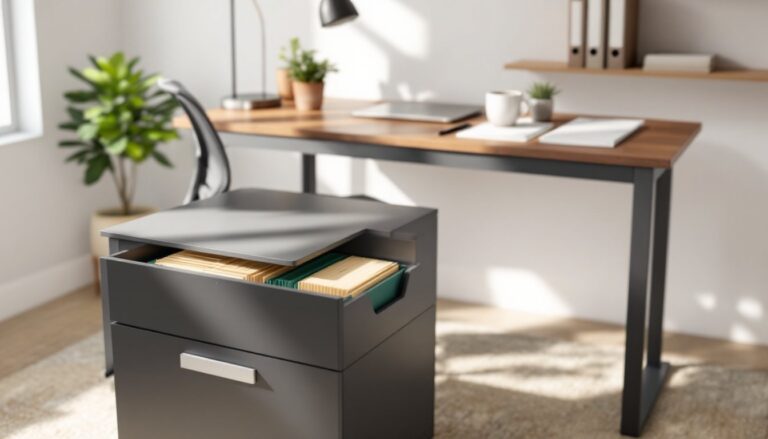
Casters fall out or don’t roll smoothly. While you have the chair disassembled, inspect the caster wheels. They push into the base legs with a grip-ring stem, no tools needed. If they’re worn or damaged, replacement caster sets cost $10–$20 for a set of five. Match the stem diameter (usually 7/16 inch or 11mm) and wheel diameter (typically 2 inches for hard floors, 2.5 inches for carpet).
One safety note: Never attempt to disassemble the gas cylinder itself. The internal pressure can cause serious injury if released improperly. Always replace the entire cylinder unit. If you encounter a cylinder that absolutely won’t come free after all troubleshooting attempts, it may be time to replace the entire chair, sometimes the cost and effort aren’t worth saving a $60 chair.